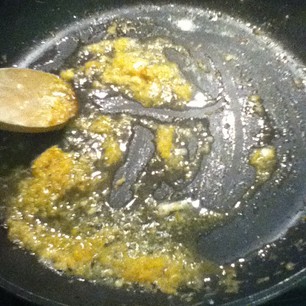
Wednesday, 30 May 2012

Number Thirteen: Sandwich Slaw

It's been so sunny and warm lately.....time for a barbecue!!!!

Every time we have a barbecue we always have to buy our beloved potato salad and coleslaw (well, not always coleslaw, but most of the time), so I thought - why not use this as a chance to make Nigella's version of coleslaw! (We still bought in the potato salad though. Sorry.)

The recipe comes from Express and is actually included to go along with grilled cheese sandwiches, but I'm sure Nigella wouldn't mind me making it separately :)

I actually prefer this to coleslaw, as sometimes the real deal has too much raw onion in it which neither me nor my dad particularly like, and this recipe has no onion in it at all! Perfect :)

I doubled the quantities, but this actually makes quite a lot, so although the quantities given below (as in the book) say it serves two, I'd say that's more like 3 or 4, especially if there's other salady bits going around.

I also swapped the Red Delicious apples in the recipe for Pink Ladies, as I think they taste superior. Nuff said.


Ingredients

1 Red Delicious/Pink Lady apple, cored and cut in to matchsticks (no need to peel)
1 medium carrot, cut into matchsticks
75g finely sliced Chinese leaf (or if, as happened to me, Tesco has run out, just use ordinary white cabbage)
1/2 tsp caraway seeds
1 tbsp mango chutney
2 tbsp mayonnaise
1 tbsp lemon juice
1/4 tsp Maldon salt/pinch table salt


Method

1. Put the apple, carrot and cabbage into a large bowl and mix well.


2. In a small bowl, mix the caraway seeds, chutney, mayonnaise, lemon juice and salt.


Yes, it looks a little bit like vomit. But that shouldn't put you off making it. It tastes GOOOOOD
 3. Scoop this over the salad, and mix until everything is well coated.


4. And that's it! Chill until you need it (but I don't think you should make it too far in advance of it might go soggy and brown) and then serve with same fab barbecue food! My daddy's australian, so he knows how to do a good barbecue.

Yum yum!!!


Sunday, 27 May 2012

Number Twelve: Mortadella Pasta Salad

This recipe comes from Express, and I chose it because I thought it seemed nice and summery - perfect for this amazing weather we've been having lately!

The recipe calls for mortadella cut into cubes, but we could only find mortadella in very fine slices, so we opted for something reasonably similar - pork luncheon meat. I'M SORRY - I know it is therefore a pork luncheon meat pasta salad and not a mortadella pasta salad, but I'm going to put mortadella in the title, as that is what it is supposed to be, and therefore what you should do.

One last thing - the dressing quantities below have been doubled from the original ones, as I felt our salad didn't have quite enough flavour. However if you don't want too much then feel free to halve it again.


Ingredients

250g fusilli (we used wholemeal)
4 tbsp extra virgin olive oil
4 tbsp lemon juice
2 tsp Maldon salt or 1 tsp table salt
1 tsp mild German mustard or similar
1 thick slice (approx 150g) mortadella, diced into 5mm squares
1 x 20g pack curly parsley, finely chopped (discard the stems)
25g parmesan flakes (plus extra to serve if you wish)
salt and pepper to taste


Method

1. Bring a pan of salted water to the boil, and cook the pasta according to pack instructions.


2. Meanwhile, whisk together the olive oil, lemon juice, salt and mustard to make the dressing.


3. When the pasta is ready, drain well and put in a large bowl. Pour over the dressing and mix well. I suggest maybe reserving some dressing to add when serving. Leave to cool.


4. When cool, stir in the mortadella, parsley and parmesan. Check the seasoning.


It is now ready to eat!! I served it with shredded lettuce and olives, but it would also be great picnic food!


Thanks for reading!!

Number Eleven: Gnocchi with Pancetta and Spinach

This recipe doesn't come from one of Nigella's books. It actually comes from the Australian version of Delicious magazine - Nigella has a page or two in each edition, and this recipe comes from the May 2012 Italian Special! For some reason, Australian cooking magazines always seem so much more exciting than British ones - I guess they're using different flavours and ingredients which makes for a bit of a change.

The recipe I'm giving you is the one printed in the magazine (give or take a few words) which serves 2, however we doubled it to serve 3 with some left over.

The recipe also says to fry a bruised garlic clove in oil to flavour it - however if you have garlic oil already, then just use that instead of the olive oil, and leave out the garlic clove.


Ingredients

2 tsp olive oil
1 garlic clove, bruised
70g pancetta, cut into 1cm cubes (we could only find rashers and so couldn't cube it, but these work fine too when cut into strips.)
200g baby spinach leaves
2 tbsp dry white vermouth or white wine
good grating fresh nutmeg
2 tbsp thickened cream (we ended up using single but I think double would work better)
2 tbsp shaved/grated parmesan
400g fresh potato gnocchi


Method

1. Warm the oil in a frying pan over a medium heat. Add the bruised garlic and cook, stirring, for about 30 seconds or so, or enough to flavour the oil. Discard the garlic. Also put some salted water on the boil ready for the gnocchi later.


2. Add the pancetta and cook, stirring, until nice and crispy. In the recipe it says this should take 2 - 3 minutes, but for us it was more like 5 - 6.


3. Add half the spinach leaves to the pan with the vermouth or wine. It looks like a lot of spinach but don't worry! It will wilt down. Just stir it around a bit until it does.


Told you it would!

4. Add the rest of the spinach and allow to wilt. As you can see from the picture above, we found that there was far too much liquid, so we drained some off. Do this if you need to as well.

5. Grind in some black pepper and grate over the nutmeg. Then, stir in the cream and the parmesan. Meanwhile, add the gnocchi to the boiling salted water and cook until they rise to the surface.


6. Once the cream is bubbling and the cheese has melted, remove from the heat and season to taste.

7. Drain the gnocchi, then add to the sauce in its pan and gently mix.


8. Finally, divide between 2 bowls or plates and serve immediately!


Yum yum yum!!!

Thursday, 24 May 2012

Number Ten: (Failed) Fudge

Alas, not all recipes turn out as expected :(

I once made some malteser fudge which the girls (and boys) at my school really loved, so I decided to make some for our (sort of) last day of school, but using Nigella's fudge recipe from How to be a Domestic Goddess. My plan was to make the fudge, and then add some maltesers to the mix. Simple...

...Or not.

My poor fudge was cooking so nicely...


...being cooked exactly according to the recipe, following it to a tee...


...even using a sugar thermometer for utmost accuracy...


...it was looking oh so tasty....


...but sadly, when it came to cutting the fudge, it was not fudge at all. It had become a crumbly mess! I did not have luxurious, creamy fudge pieces - I had crumbly sugar dust!

So sad :'(

I don't think it would be fair to post the recipe on here and doom you to failure. However Istill  feel thicounts as one of my 100 recipes; just because it didn't work, doesn't mean I didn't try!

At least the apple kuchen turned out well :)

Ahh well, it wasn't all bad - I had a massive box of maltesers and only used a few in this, so got to eat all the rest to drown my sorrows. Just tidying up after all... ;)

Number Nine: Apple Kuchen

Hello again!


I haven't mentioned this before, but this week has been my last week ever of school!! WOOO!!
To celebrate our last german lesson, my class planned an abschiedsparty (or farewell party if you aren't cool enough to speak german). Everyone brought something - we had brownies, coke, party rings, rocky road cupcakes...and my contribution was Nigella's apple kuchen, to keep with the german theme.


It's not really a cake so to speak, but rather a sort of yeasty, bread-like texture. It's quite different to the stuff I usually make, and was enjoyed by all bar one of my friends. Even the german assistant approved! The recipe is from How to be a Domestic Goddess.


To make this you need a swiss roll tin or a rectangular baking tray, approx 30cm by 20cm and at least 5cm deep.


Ingredients


For the dough:
350 - 400g strong white bread flour
1/2 tsp salt
50g caster sugar
3.5g (half a sachet) easy-blend yeast, or 7g fresh yeast
2 eggs
1/2 tsp vanilla
grated zest of 1/2 lemon
good grating fresh nutmeg
125ml lukewarm milk (mine came straight from the fridge, so I just gave it 20 seconds in the microwave to warm it up)
50g softened unsalted butter


For the topping:
1 egg
1 tbsp cream (it is unspecified, so I used single)
grating of fresh nutmeg
2 large granny smiths (however, I would recommend swapping at least one of these for a sweeter apple that will cook down a little more and become pulpy, as my kuchen was a little dry. I also suggest using 3 apples as two wasn't quite enough)
1.5 tbsp demerara sugar (original recipe states 1 tbsp but I think more works better)
1.5 tbsp caster sugar (as above)
1/4 tsp mixed spice/allspice
2 tbsp flaked almonds


For the icing:
75g golden icing sugar (could find this so just used the regular stuff)
1 tbsp hot water


Method


1. Grease the tin and line with baking parchment.


2. Put 350g of the flour in a bowl (no need to sieve unless it's really lumpy) and add the salt, sugar and yeast. Mix together.


3. In a separate bowl, beat the eggs with the vanilla, lemon zest, grated nutmeg and milk.


4. Stir into the dry ingredients to make a medium-soft dough. Be prepared to add more flour if necessary.


5. Work in the soft butter. Then, knead by hand for about 10 minutes on a lightly floured surface (or for about 5 minutes by machine.) When ready, it should be smoother and springier.


Obese hand


6. Pop on a plate and cover with a tea towel. Leave to rise until doubled, approx 1 - 1.25 hours; or alternatively leave to rise slowly in the fridge overnight (clingfilmed).

7. When ready, punch down and press to line the tin. Try and make sure it's reasonably flat, or else the egg and cream mix will slip into the centre later on. Leave it to prove for a further 15-20 mins.


8. Meanwhile, preheat the oven to 200C/ fan 180C/ gas mark 6.

9. Peel and core the apples and cut into small chunks.


Artistic apple slicing - is there any other way?

10. When the dough is ready, beat the egg with the cream and nutmeg, and brush this over the dough. Make sure you use it all, as this is what makes the cake squishy and moist. It is quite dry without it.


11. Cover the dough with the apples. Mix together the sugars and mixed spice, and sprinkle over evenly.


12. Top with the flaked almonds, and put in the oven for 15 minutes. Now turn the heat down to 180C/ fan 160C/ gas mark 4, and cook for a further 15 minutes or so, until the dough is swelling and golden at the edges, and it is cooked through.


13. Mix the icing sugar and hot water, and drizzle over the cake. Nigella suggests leaving it to cool for 15 minutes and then eating it, but mine was for the next day, so I let it cool completely and then sliced it.

And here it is!!


Although yummy, I do think it would be better warm, because let's face it - everything is better warm. Some of the edge pieces of mine were a little dry (probably because I DIDN'T use all the egg and cream mixture) but the bits from the middle were lovely and moist. I think next time I'll use cooking apples so it goes more pulpy, put more cinnamon in and on the dough, and use more glaze. But overall, a nice recipe!

Thanks for reading!

xxxxxx

Sunday, 20 May 2012

Number Eight: Rapid Roastini

I made these to go with the speedy scaloppine below, but they would go great with anything really - crumbed fish, chicken goujons, steak...pretty much anything that goes well with chips!

The basic quantities are 125g fresh gnocchi, and 1 tbsp olive oil per person.


All you have to do is heat the oil in a large saucepan or wok. When hot, add the gnocchi.


Fry them until golden brown, turning occasionally; but don't handle them too much or they'll start to fall apart!


And that's it! Really easy. They're so so tasty - crispy on the outside and fluffy in the middle. They practically melt in your mouth, they're so good :)

Well, that's all for tonight folks - thanks for reading!!

Number Seven: Speedy Scaloppine

Time for dinner!

I decided to cook the speedy scaloppine from Kitchen - quick and very tasty! I served them with Nigella's rapid roastini (from the same book), the recipe for which I will post after this. And some salad. Goota have the salad.

I used turkey but Nigella also suggests pork, and also says that in Italy, you would use veal. So use whatever you want! Go nuts.

The recipe below is the one in the book, for two people. My pictures will show more turkey, however, as I increased the quantities by half to make it for 3.

Ingredients

2 tbsp plain flour
good shake mixed spice
good shake cayenne pepper
4 small turkey escalopes, about 350g total
2 tbsp garlic oil
zest and juice of a lemon
salt, to taste


Method

1. Put the flour and spices into a freezer bag (or a very fashionable Asda bag, as I have done. Trendsetter.) Add the escalopes and shake them to coat in the flour mix. I found that they didn't coat all that well, so you may have to get your hands dirty to help distribute the flour.


They're looking rather weird here. Blame Instagram
2. (If you are making this with the roastini above, then start making them and give them a good few minutes frying before you do this next bit.) Heat the oil in a heavy based frying pan and add the floured meat.


3. Cook for about 2 mins each side, or until cooked through.


It's quite hard to make them look yummy, but they smell great!

4. Remove the escalopes to plates and remove the pan from the heat. Add the zest and juice, and salt to taste, and stir until the juices are golden and slightly syrupy.


5. Pour over the scaloppine, pop some roastini on the plate and serve!


This was a nice recipe - really quick to make, simple, and very tasty! The turkey was nice and tender, and juicy as well so you don't need any condiments or anything.

Yay!

Read the next post to find out how to make those yummy roastini!


Tuesday, 15 May 2012

Number Six: Green Eggs and Ham

My dad cooks dinner on a tuesday, and to help me out he agreed to cook one of Nigella's recipes with me, so I can be one step closer to the big 100!

We picked green eggs and ham from Nigella Express because they looked pretty simple and very yummy (and they are!)

We doubled the recipe (which is meant to make 5 crepes) but only made 7 of varying sizes - probably as we are not deft in the art of crepe making, so our crepes were probably too thick and, well, a bit 'crepe', if you'll pardon the pun. I'm sure if you're good at it you'd get 10 out of the doubled amount; we might've got 8 if ours were more uniform in size.

Here is the original recipe for 5 crepes:

Ingredients

-75g green pesto (Nigella recommends fresh pesto, but we used some from a jar which was just fine)
-1 egg
-75g plain flour
-150ml semi-skimmed milk
-oil for frying
-5 large thin slices of ham


Method

1. Whisk together the pesto, egg, flour and milk until smooth, and the worst of the lumps are gone.


Mmmm.....yummy.............? Please remember ladies and gents - don't just a book by it's cover (or colour in this case)

2. Oil a crepe pan (or a large frying pan if, like us, you don't have a crepe pan). We poured some oil in and then I spread it around with a pastry brush to make sure it was evenly spread. Wipe away any excess so there's just a thin film of oil.

3. When hot, take a ladleful of batter and pour in the pan. Swirl it around quickly and tilt the pan to spread the mix before it starts to set.


4. When cooked underneath, try to flip the crepe. Sadly, this resulted in my crepe breaking :( But I guess that's all part of the challenge!

RIP crepe....he was a good crepe :(

5. Place on a sheet of baking parchment. Continue to cook the crepes, layering between pieces of baking parchment as you go.


6. When they're all finished, roll each one up with some ham and go!


I must admit, I thought that these would be really dry - especially since it's just ham inside and not cheese or a sauce of any kind. But actually they aren't at all! They're really tasty, which is surprising really considering how simple they are.

Another successful recipe. Thanks Nigella!

Sunday, 13 May 2012

Number Five: Spaghetti Alla Carbonara

I normally get to cook dinner once a week (I'd love to do it more but my mother usually just gives me the one day), and so to change it up a bit, I decided to look online at Nigella's website for a recipe.

I decided on spaghetti alla carbonara - another well-known dish that I haven't actually tried before - because it looks really yummy, and perhaps more importantly, all of us would like it! (And obviously because I wanted to try it.)


The link to the recipe is below if anyone would like to see it; I think it's worth a look for the introduction alone! I love how Nigella always writes introductions to her recipes - it makes the food more personal and it makes the cookbook more fun to read!

http://www.nigella.com/recipes/view/spaghetti-alla-carbonara-127

The recipe uses 500g spaghetti for two people. This is of course rather a lot, but the reasons for this are explained in the online recipe. I decided to instead use 300g spaghetti for the three of us (which was plenty), but use the same amount of sauce, as we like sauce a lot in my family. Saucy saucy.

Ingredients

-500g packet spaghetti
-275g pancetta or lardons (I bought ready cubed pancetta out of pure laziness and convenience, but if that's unavailable buy a chunk of it instead, and cube it yourself, removing the rind) 
-2 tsp olive oil
-60ml dry white wine or vermouth
-4 eggs
-50g Parmesan, freshly grated (don't buy the dried powdered cheese; it's just not as good as fresh!)
-60ml double cream
-Black pepper
-Freshly grated nutmeg


Method:

1. Put some water on the boil ready for the spaghetti. I always add a little salt and olive oil to the water when cooking pasta, because that's how everyone in my family does it - I can't say why for sure but my guess is that the salt adds flavour, and the oil stops it sticking.

2. Meanwhile, heat the 2 tsp oil in a large saucepan big enough to hold all the pasta later (I used my trusty wok again). Fry the pancetta cubes until crispy, but not too crunchy. Most of the really fatty bits should have melted down, and the smell of salty bacon will be filling the kitchen. If you have a greedy labrador, they are likely to appear at this point.


3. Pour the wine over the pancetta cubes and allow to bubble away for a few minutes, until reduced. Remove from the heat.

4. Beat together the eggs, parmesan and cream and season with black pepper.

5. When the sketty (or spaghetti if you're not a Christley) is ready, reserve about 125ml of the cooking water and then drain.

6. Return the pan with the pancetta cubes to the heat and add the spaghetti, tossing to coat in the mix. As always happens, no matter how well you toss, most of the pancetta will sit at the bottom anyway and refuse to blend. Don't worry about this - just spoon it over the pasta when you serve it later.


7. Remove the pan from the heat and stir in the egg mixture, tossing to coat.


8. Season with more pepper and grate over some nutmeg, and then serve!


You get more than this each don't worry, I was just super keen to take a picture so I could eat it!

This dish is extremely rich and extremely satisfying - the kind of meal where I know I'm full but I finish it anyway because it's so good! I found that it had plenty of cheesy flavour, but my parents both grated a mound of extra parmesan on theirs, so I suggest grating some extra to put on the table for any guests who are cheese crazy. Or do what I did and just leave the block of cheese  on there with a grater; if they want it enough they're willing to do it themselves. Fact.

Another thing to add: my mum actually said that it was a shame I hadn't made more! Which was quite a nice compliment! (Or a thinly veiled complaint, you decide). It did taste very VERY good, but I don't think I could've managed much more myself just because it was so very filling and rich.

But again, those same words: this was really yummy, go and make it!!

Thank you for reading!